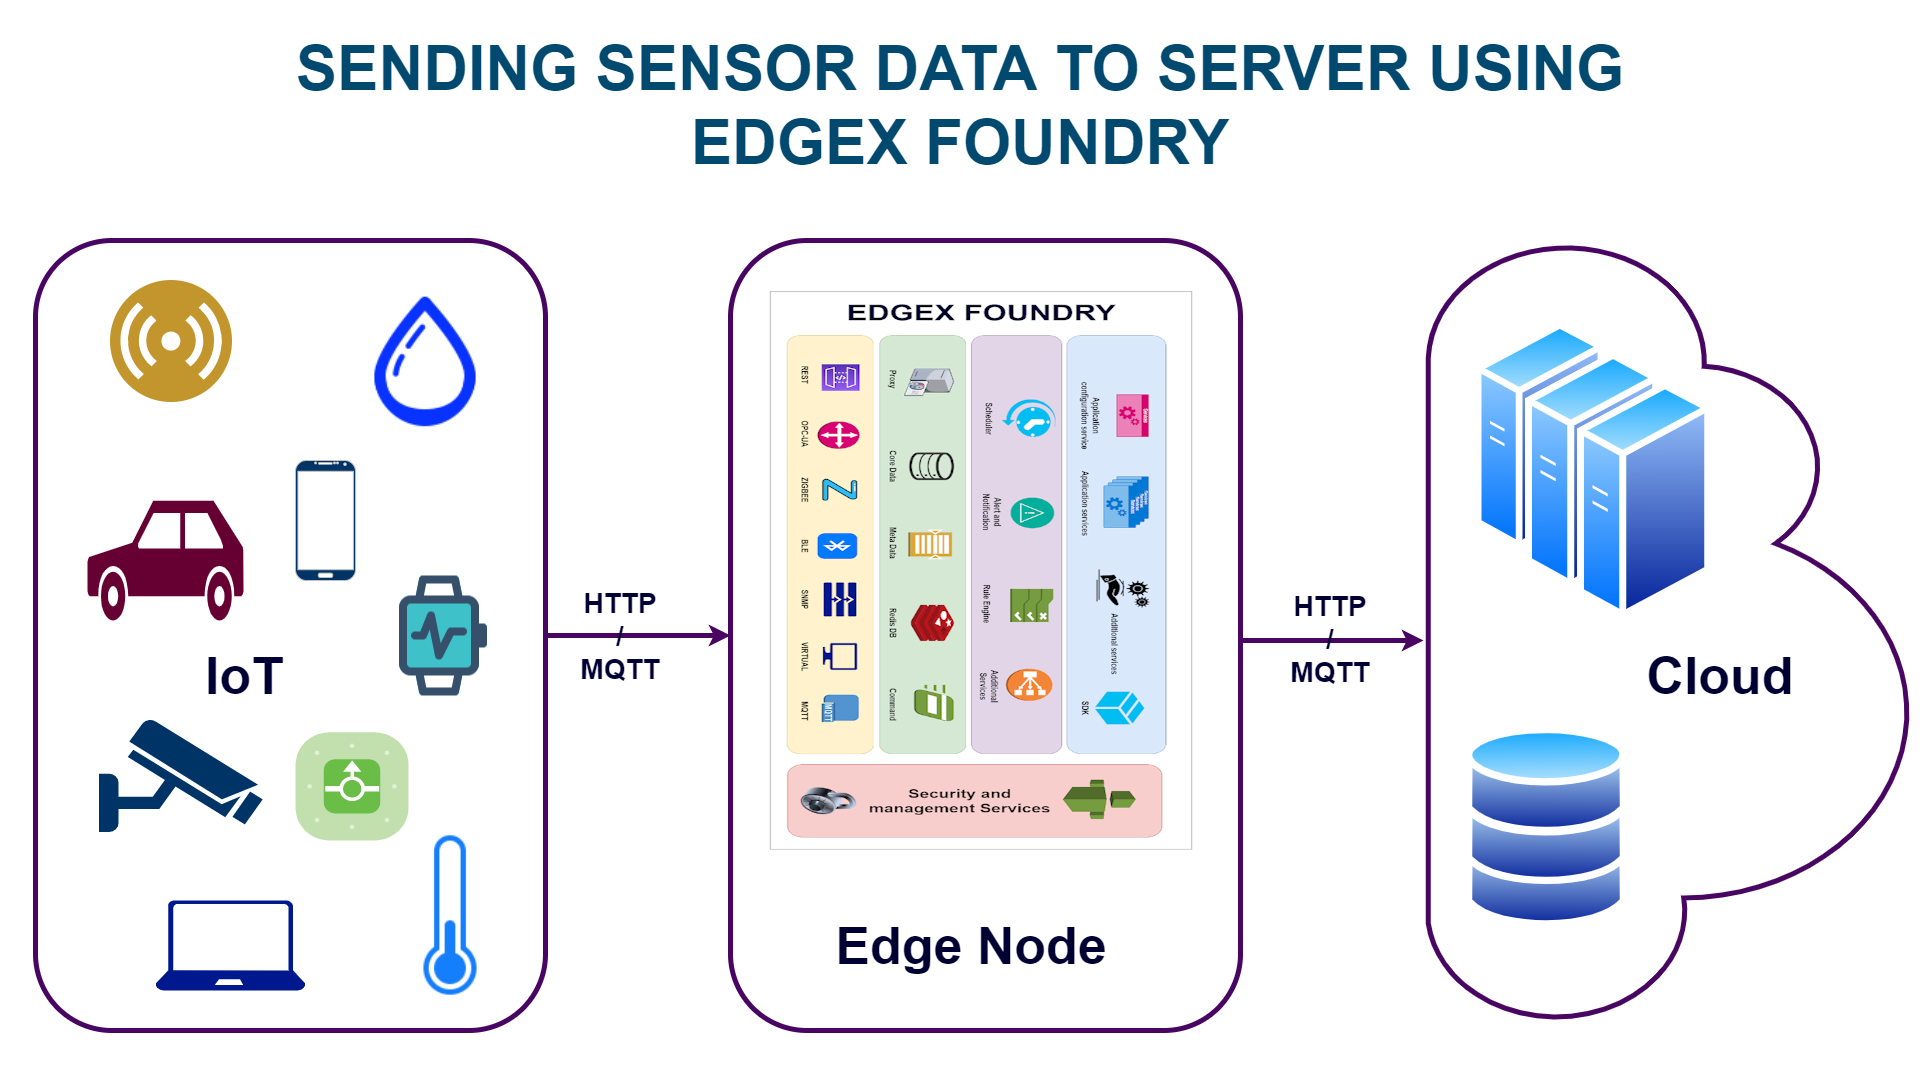
From the previous post, we are clear about the installation and accessing of edgex foundry. Now using that edgex we can send sensor data to the server/cloud or to any devices like smartphones. For example, if we want to control our home IoT devices like light, fan, AC, TV, refrigerator, etc.(Anything that can act as an IoT device) using our smartphone, we can do that also using MQTT protocol. Anyways I will discuss the MQTT pub-sub model and its working mechanism in the next post. Let's talk about the usage of edgex foundry by one example.
Here I am discussing to send and fetch the sensor data to and from the edgex foundry respectively using the Http service.In order to send data to edgex first, we need to set up a device on edgex using UI or the rest API. So setting up a device means, let the edgex be aware of the existence of the device, be able to receive data from the device, understand the type and format of data, etc. The following steps are used to set up a device.
Before that make sure the edgex foundry is accessible by its IP address. If not, then you can change the port of all services from "127.0.0.1" to "0.0.0.0" in the docker-composer.yml file and restart all services.
1. Create value descriptors
2. Upload the device profile
3. Create the device
1. Create value descriptors
Value descriptors describe a value. They tell EdgeX what format the data comes in and what to label the data with. Here I am creating value descriptors for temperature and humidity values.
Open Postman and use the following values:
Method: POST
URI: http://<edgex ip>:48080/api/v1/valuedescriptor
Payload settings: Set Body to “raw” and “JSON”
Payload data:
{
"name": "humidity",
"description": "Ambient humidity in percent",
"min": "0",
"max": "100",
"type": "Int64",
"uomLabel": "humidity",
"defaultValue": "0",
"formatting": "%s",
"labels": [
"environment",
"humidity"
]
}
Tip: Use the very excellent feature “Beautify” on the “Body” tab in Postman to fix any indentation issues with the JSON payload.
Watch for the return code of “ 200 OK ” and the ID of the newly created value descriptor.
There is no need to make note of the ID.
Update the body and issue the command again for temperature::
Method: POST
URI: http://<edgex ip>:48080/api/v1/valuedescriptor
Payload settings: Set Body to “raw” and “JSON”
Payload data:
{
"name": "temperature",
"description": "Ambient temperature in Celsius",
"min": "-50",
"max": "100",
"type": "Int64",
"uomLabel": "temperature",
"defaultValue": "0",
"formatting": "%s",
"labels": [
"environment",
"temperature"
]
}
Viewing value descriptors through Postman
2. Upload the device profile
EdgeX incorporates device profiles as a way of easily adding new devices. A device profile is essentially a template that describes the device, its data formats, and supported commands. It is a text file written in YAML format which is uploaded to EdgeX and later referenced whenever a new device is created. Only one profile is needed per device type. Some vendors provide pre-written device profiles for their devices. In this case, I am using a custom device template.
Get a copy of the device profile from here:
In Postman use the following settings:
Method: POST
URI: http://<edgexip>:48081/api/v1/deviceprofile/uploadfile
Payload settings: This part is a bit tricky:
● Set Body to “form-data”
● Hover over KEY and select “File”
● Select the yaml file: sensorClusterDeviceProfile.yaml
● In the KEY field, enter “file” as key
Or you can upload the device profile using the UI.
3. Create the device
Now EdgeX is finally ready to receive the device creation command in Postman as
follows:
Two items are particularly important in this JSON body:
● The device service “edgex-device-rest” is used since this is a REST device.
● The profile name “TestSensorData” must match the name in the device profile yaml file uploaded in the previous step.
Feel free to change values for description, location, labels, etc. if desired.
In Postman use the following settings:
Method: POST
URI: http://<edgex ip>:48081/api/v1/device
Payload settings: Set Body to “raw” and “JSON”
Payload data:
{
"name": "Temp_and_Humidity_sensor_data",
"description": "DTH11 sensor data",
"adminState": "unlocked",
"operatingState": "enabled",
"protocols": {
"example": {
"host": "dummy",
"port": "1234",
"unitID": "1"
}
},
"labels": [
"Humidity sensor",
"Temperature sensor",
"DHT11"
],
"location": "India",
"service": {
"name": "edgex-device-rest"
},
"profile": {
"name": "TestSensorData"
}
}
If the above commands completed successfully a new sensor device will have been registered and EdgeX is ready to receive data from it.
Demonstration:
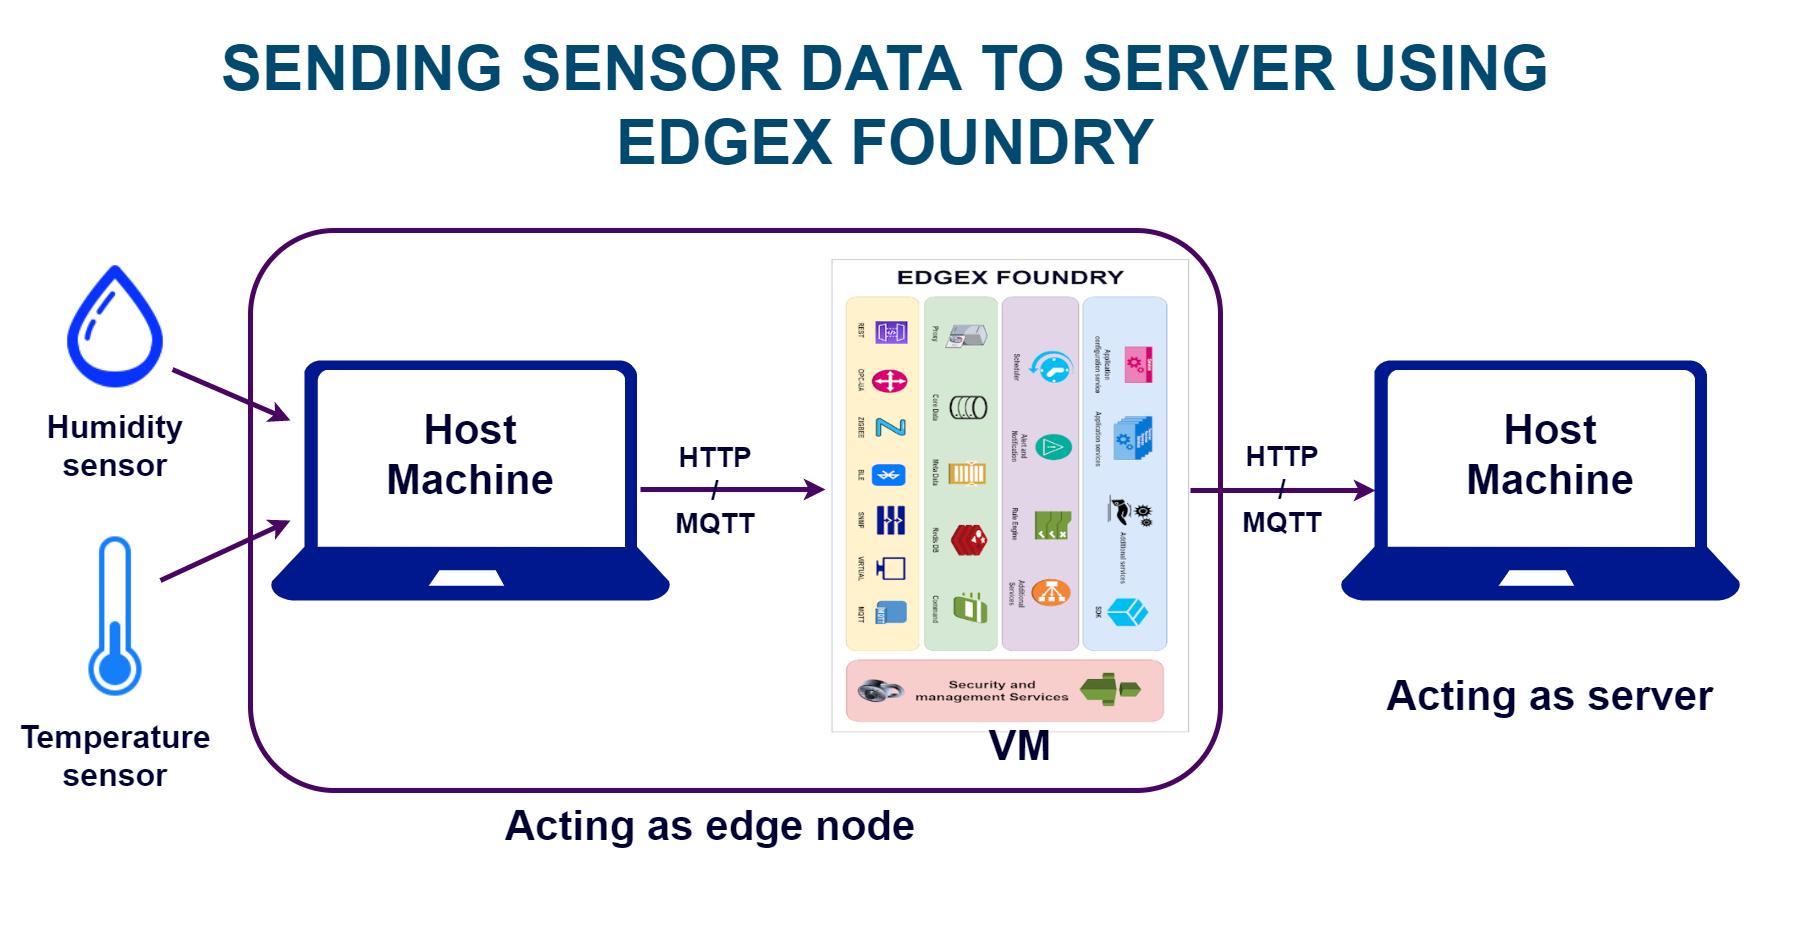
Here I am trying to demonstrate the above things with the below setup but you can use a Raspberry pi for the edge node:-
Send data:-Here I am getting the temperature and humidity data from my host machine(edge node) serial port through the Arduino nano and sending these to data to the edgex foundry using an Http POST request. The Arduino code to get the sensor data and the python code for POST Http request can found here.
The POST command to send data:-
http://<edgex ip>:49986/api/v1/resource/Temp_and_Humidity_sensor_data/temperature
You can send the value as payload and every POST call make an event count. So you can see that using this URL on your web browser:-
http://<edgex ip>:48080/api/v1/event/count
Fetch data:-
Making the HTTP GET request from the host machine (which will be acting as a server now) to get the saved data from edgex foundry.
The GET command to fetch the data:-
http://<edgex ip>:48080/api/v1/reading
Here is the video demo of DTH11 sensor:-
Download Resources which contains the Arduino and python script shown in the video.


