
Before going to deploy our code into Raspberry Pi, There are few Things to know..!
1. What is Raspberry Pi?
2. Why we need Raspberry Pi?
3. What are the pre-requirements?
4. How to setup Raspberry Pi?
1. What is Raspberry Pi?
Raspberry Pi is a single-board computer made by the raspberry pi foundation in 2012 aimed to provide easier access to computers at affordable prices.
In a single word, Raspberry Pi is a replacement for CPU. If you have only mouse and keyboard, you can convert your home LED/LCD to Personal Computer using Raspberry Pi which price is only between 3000 to 4000. See the bellow figure to know what are the components used in Raspberry Pi 4 Model B.
In a single word, Raspberry Pi is a replacement for CPU. If you have only mouse and keyboard, you can convert your home LED/LCD to Personal Computer using Raspberry Pi which price is only between 3000 to 4000. See the bellow figure to know what are the components used in Raspberry Pi 4 Model B.
 |
| Raspberry Pi 4 Model B |

And They have been released several versions of Raspberry Pi since 2012.

2. Why we need Raspberry Pi?
The Raspberry Pi is a very cheap computer that runs Debian based Linux operating system called Raspbian OS as well as there are some third party OS that supports Raspberry Pi (Ex:- Windows 10 IoT core OS, UbuntuMATE, RISC OS), but Raspbian OS is preferably used.

Out of that it also provides a set of GPIO (general purpose input/output) pins that allow you to control electronic components like various Sensors for physical computing and explore the Internet of Things (IoT).
In the whole world, people are using Raspberry Pis to develop their programming skills, build hardware projects, do any kind of home automation, and even use them in many industrial applications.
It promotes Python and Scratch as the main programming languages, with support for many other languages like C, C++, Java, Perl, JavaScript, JQuery, HTML5, etc.
3. Requirements to Setup Raspberry Pi for Project
Setup Overview:-
This setup is for Linux Ubuntu Distro in which we are going to access the raspberry pi desktop virtually in the same network(wireless).
So first we install the Raspbian OS on Raspberry Pi and using the IP Address of Raspberry Pi we access the Raspbian OS on our Ubuntu Desktop like Virtual Machine.
If you want to know what is a virtual Machine..?👉Click Here👈
Hardware Requirement:-
3. One Type C USB cable (for Raspberry Pi 4)
Software Requirement:-
1.Raspbian Operating System
Assuming you have all the required hardware.
4. Setup for Raspberry pi:-
Step 1:- Download the ZIP file of the Raspbian Operating System from the there official site.
https://www.raspberrypi.org/downloads/raspbian/
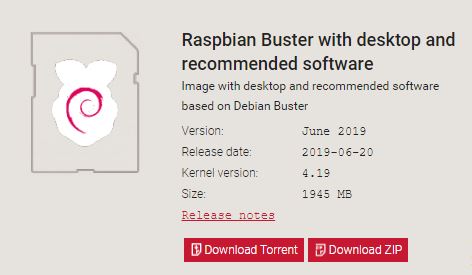
This version comes with a complete stack of Raspbian OS with a desktop environment and some software tools and applications. This version is recommended for most people starting out with the Raspberry Pi.
https://www.raspberrypi.org/downloads/raspbian/
This version comes with a complete stack of Raspbian OS with a desktop environment and some software tools and applications. This version is recommended for most people starting out with the Raspberry Pi.
You can download the ZIP file or from the Torrent link.
Step2:- Unzip the downloaded Raspbian OS zip file.
Step3:- Insert the micro SD card into your PC and find the device name by typing the below command on the terminal.
sudo fdisk -l or lsblk
It lists all disks connected to your system.
Step4:- Run the final command to write the image file into the micro SD.
sudo dd if=/home/user/Downloads/filename.img of = /dev/sdc status=progress bs=4M
sudo:- superuser do(Root permission)
dd:- Convert or Copy a file
if= input file :-Read from File
of=output file:-Write to File
status=progress:- Shows the current progress
bs=4M:- Read and Write up to 4MB at a time
dd:- Convert or Copy a file
if= input file :-Read from File
of=output file:-Write to File
status=progress:- Shows the current progress
bs=4M:- Read and Write up to 4MB at a time
Wait to complete the write operation and control return to the console.
Here we will do headless setup:-
That means no HDMI cable or Ethernet cable required to access the raspberry pi. If you have WIFI access we can do these two setup to directly ssh our raspberry pi after boot. Here we are setting up "ssh" or "wifi" config on SD card before boot.
Go inside the SD card and create below files.
1. SSH
Only thing you need to do is just create a file named "ssh" and placed it inside the SD card.
2. WIFI access
2. WIFI access
Here you have to create a file named "wpa_suplicant.conf". And place the below text inside it. (List of ISO 3166 alfa 2 country codes)
country=IN
ctrl_interface=DIR=/var/run/wpa_supplicant GROUP=netdev
update_config=1

network={
    ssid="NETWORK-NAME"
    psk="NETWORK-PASSWORD"
}
If you are editing these files in windows, then take care of the ".txt" at the end of each file. It should not be there.
After placing these two files in side the SD card. power on your Raspberry PI and insert the SD card. and try to ssh with bellow command with user name "pi" and default password will be "raspberry".
ssh pi@192.168.0.101

If you don't know the ip address of your raspberry pi. Then login to your router with ip 192.168.0.1 and use "admin" as both username and password. Try to find out your raspberrypi ip address.


